Sharing check-level details on your Transparency Center is optional but recommended. If you choose this option, taxpayers and internal stakeholders can explore expenditures by specific transaction and see the details of every check your organization has issued to vendors.
Below, you will learn:
- How to display check details with Open Checkbook
- How to use the Open Checkbook feature in ClearGov
Note: You can select any image below to zoom in.
How to Display Check Detail with Open Checkbook
Once the open checkbook data has been uploaded, follow the steps below to enable it in your Transparency Center.
Note: For instructions and best practices on providing check details to ClearGov’s Data Team for upload, check out the Support Center article Data Onboarding - Check Detail (Open Checkbook).
From the left-hand navigation sidebar, navigate to the Engage solution and select the Transparency module.
From Transparency follow the steps outlined below to set Open Checkbook data to display within your Transparency Center’s financial data settings, and set the Checkbook page to display to the public.
In Transparency Financial Data Settings:
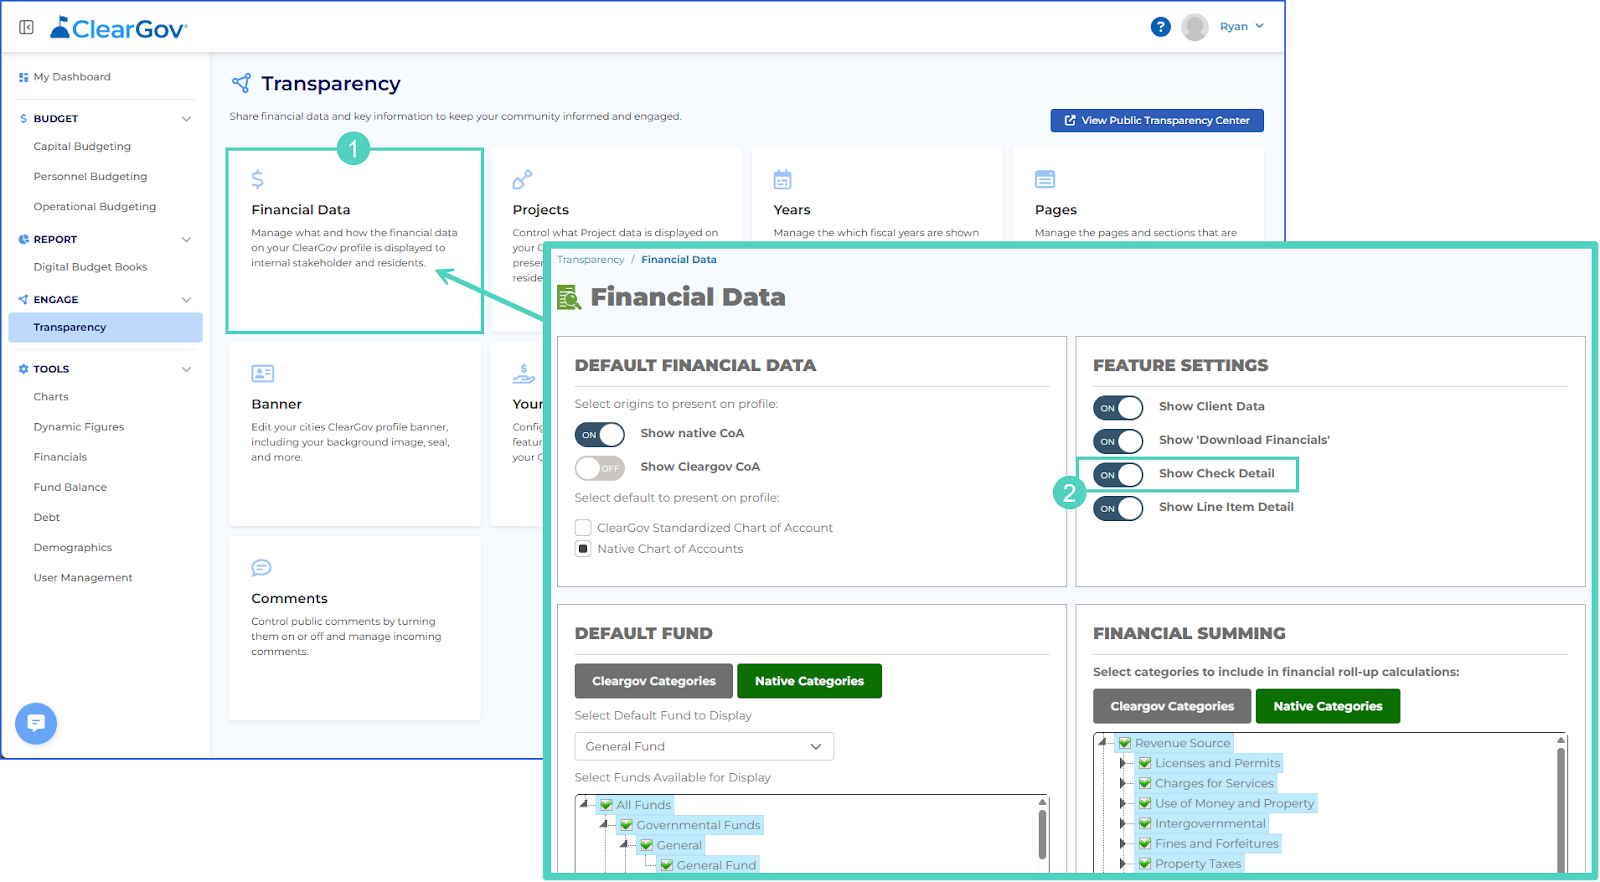
- Select the Financial Data tile.
- Under the Feature Settings, toggle Show Check Detail ON.
In Transparency Pages Settings:
- Select the Pages tile.
- Toggle the Checkbook page to YES for it to be publicly accessible.
How to Use the Open Checkbook Feature in ClearGov
Now your newly-uploaded open check data details will display in the Transparency Center under the Checkbook tab.
Here, stakeholders and constituents can…
- Utilize the search fields to locate data by vendor or description.
- Select specific expenditure types.
- Specify a start and end date to narrow down the checkbook detail to a specific time period.
- Download the checkbook to export check details to an Excel file.
Have more questions or need assistance?
Submit a Request